- QuickStart Index
- 1. QuickStart - General
- 2. Hardware Interface Configuration
- 3. Zone and Zone Device Configuration
- 4. Editing Tools - Up/Dn & Edit Device
- 5. Editing Tools - Device Config
- 6. Editing Tools - Favorites
- 7. Editing Tools - Custom Buttons
- 8. Zone Macros
- 9. Automation - Adding Elements
- 10. Automation - Assigning Elements
- 11. Registering Controllers
- 12. Loading Configs
![]()
![]()
![]()
![]()
![]()
![]()
![]()
10. Automation
Assigning Automation Network Elements to a Zone
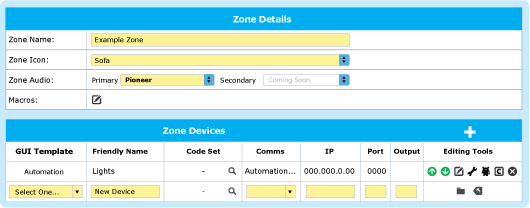
- Adding and Configuring the Automation Interface in the Zone panel
Add an Automation Interface with the + button of the Zone Devices panel and assign the correct settings for each of these devices:
- GUI Template – choose the Automation Template
- Friendly Name – name the service (eg Lights, Doors, or Automation) – as it will appear as in the Controller GUI)
- Ignore the CODE SET
- Comms - select the Automation Interface – the IP address and port will populate automatically
- Click apply, this will save the new zone page and the Robot icon will appear
- Click on the Spanner icon and the Automation Zone Elements panel will appear and you will be able to add Automation Network Elements to this zone
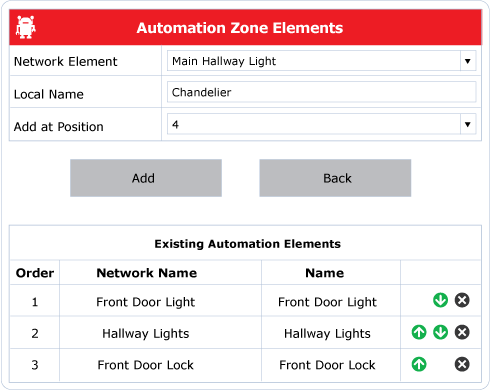
2. Adding Automation Network Elements to a Zone
- Select Robot icon in Editing Tools to chose Network Element and enter Local Name if a different name is required for the Network Element, otherwise the same name from the Hardware Interface panel will be entered. Click add. Repeat as necessary
- Reorder the Network Elements with the green arrows